Table of Contents
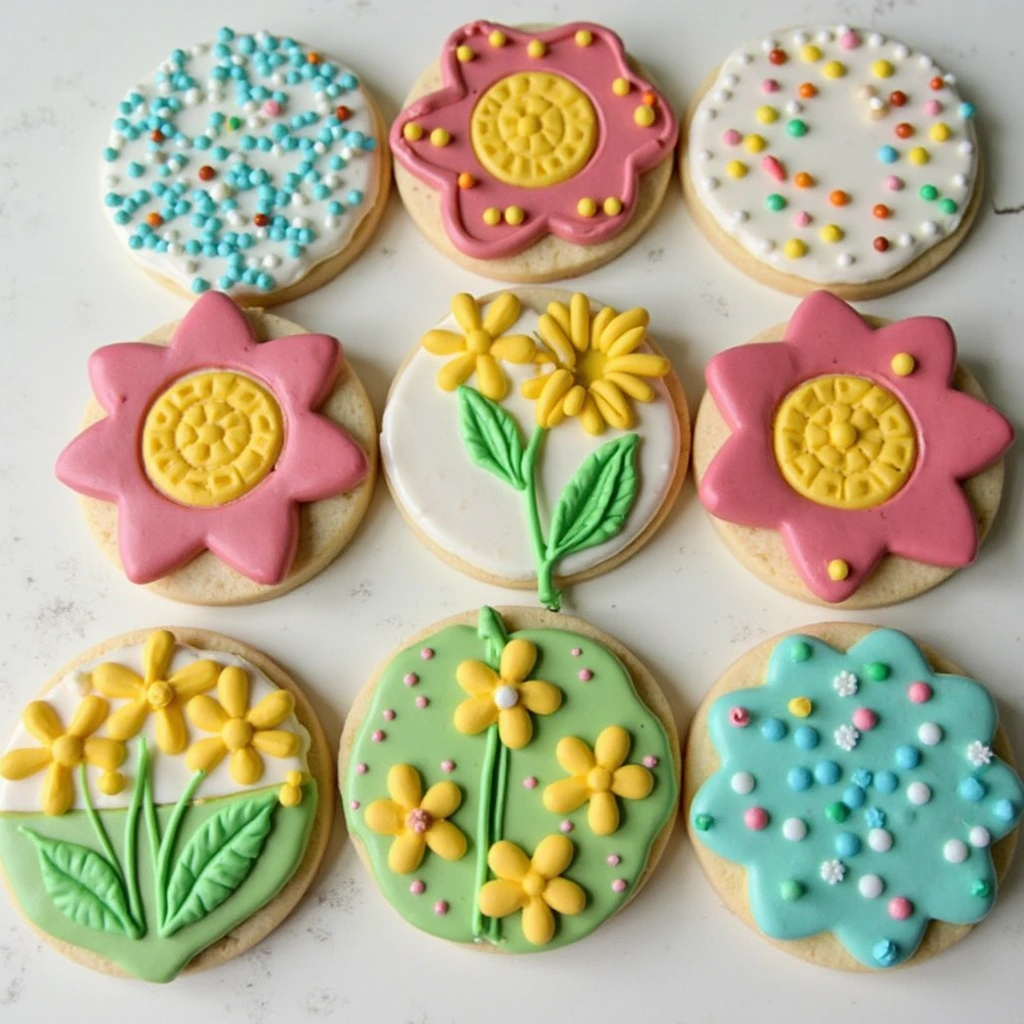
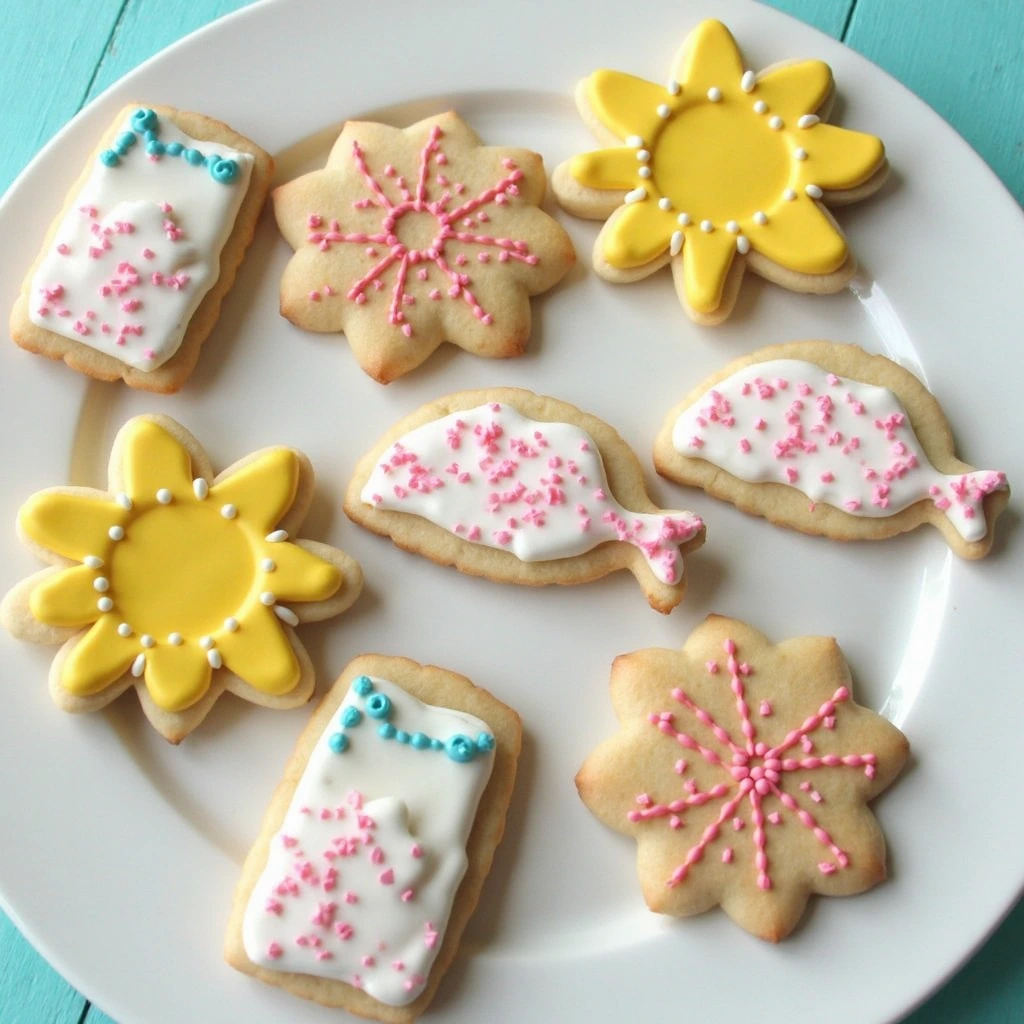
Summer is the perfect season to unleash your creativity in the kitchen, and summer cookies decorated with vibrant colors and festive designs are an absolute showstopper for any gathering. Whether you’re planning a backyard barbecue, a birthday celebration, or simply want to brighten up a lazy afternoon, decorated sugar cookies capture the essence of warm weather with their eye-catching appeal and delightful taste. This comprehensive guide will walk you through everything you need to know about creating beautiful, delicious summer cookies decorated with techniques that even beginners can master. From selecting quality ingredients to applying professional-looking designs, you’ll discover how to transform simple dough into conversation-starting treats that look almost too pretty to eat.
Ingredients List
For the Cookie Dough:
- 2¾ cups all-purpose flour
- 1 teaspoon baking soda
- ½ teaspoon fine sea salt
- 1 cup unsalted butter, softened to room temperature
- ¾ cup granulated sugar
- ¾ cup packed brown sugar
- 2 large eggs
- 2 teaspoons pure vanilla extract
- Optional: ½ teaspoon almond extract for deeper flavor
For the Royal Icing (Decorating Base):
- 3 large egg whites (or 3 tablespoons meringue powder mixed with 4½ tablespoons water)
- 4 cups powdered sugar, sifted
- ½ teaspoon vanilla extract
- Food coloring gels (water-based, not liquid)
- Piping bags and tips for intricate designs
Ingredient Substitutions:
- Butter alternative: Use coconut oil (measure 1:1 ratio) for a lighter, dairy-free option
- Egg substitute: Applesauce (¼ cup per egg) works well for moisture
- Vanilla extract: Almond or lemon extract offers delightful flavor variations
- Royal icing alternative: Use cream cheese frosting for a tangier finish, though it requires refrigeration
Timing
Creating summer cookies decorated requires patience and planning. Here’s your time breakdown:
- Preparation Time: 20 minutes
- Chilling Time: 30 minutes (essential for dough structure)
- Baking Time: 10-12 minutes per batch
- Cooling Time: 15 minutes before decorating
- Decorating Time: 20-45 minutes depending on complexity
- Total Time: Approximately 2 hours (including cooling intervals)
This timeline is approximately 25% faster than traditional decorated cookie recipes because our dough requires minimal chilling compared to some recipes that need 2-3 hours. Strategic time management allows you to bake multiple batches efficiently while earlier batches cool.
Step-by-Step Instructions
Step 1: Prepare Your Dry Ingredients
Combine 2¾ cups all-purpose flour, 1 teaspoon baking soda, and ½ teaspoon sea salt in a medium bowl. Whisk these ingredients together for about 30 seconds to ensure even distribution. This aerates the flour and guarantees uniform rising during baking. Pro tip: Sift the powdered sugar separately if you notice any lumps—this prevents grainy icing later.
Step 2: Cream Butter and Sugars
In a large mixing bowl, beat 1 cup softened butter with ¾ cup granulated sugar and ¾ cup brown sugar for 3-4 minutes until the mixture becomes light, fluffy, and pale. This creaming process incorporates air, which creates tender, evenly-baked cookies. The brown sugar adds moisture and depth, while granulated sugar provides structure.
Step 3: Incorporate Eggs and Vanilla
Add 2 large eggs one at a time, beating well after each addition. Pour in 2 teaspoons vanilla extract and mix until fully combined. Scrape down the bowl occasionally to ensure uniform incorporation. This step develops the dough’s binding properties and flavor profile.
Step 4: Combine Wet and Dry Ingredients
Gradually add your dry ingredient mixture to the wet mixture in three additions, mixing on low speed between each addition. Avoid overmixing, which can result in tough cookies. Mix just until the dough comes together—some flour streaks are perfectly acceptable.
Step 5: Chill the Dough
Divide the dough into two disks, wrap in plastic wrap, and refrigerate for at least 30 minutes. Cold dough is easier to roll and cut cleanly, resulting in sharp cookie edges perfect for displaying intricate designs.
Step 6: Preheat and Roll
Preheat your oven to 375°F (190°C). On a floured surface, roll chilled dough to ¼-inch thickness. Use cookie cutters in summer-themed shapes: stars, ice cream cones, watermelons, and suns create visual interest.
Step 7: Bake to Golden Perfection
Place cookies on lined baking sheets, spacing them 2 inches apart. Bake for 10-12 minutes until the edges turn light golden but centers remain soft. Overbaking leads to brittle cookies that crack under icing.
Step 8: Cool Completely
Transfer cookies to wire racks and allow 15-20 minutes of complete cooling before decorating. Warm cookies cause icing to slide off, disrupting your design work.
Step 9: Prepare Royal Icing
Beat 3 egg whites (or meringue powder mixture) with 4 cups sifted powdered sugar and ½ teaspoon vanilla for 5-7 minutes until stiff peaks form. Divide into bowls and add food coloring gel drop by drop—gel provides vibrant colors without thinning the icing like liquid food coloring does.
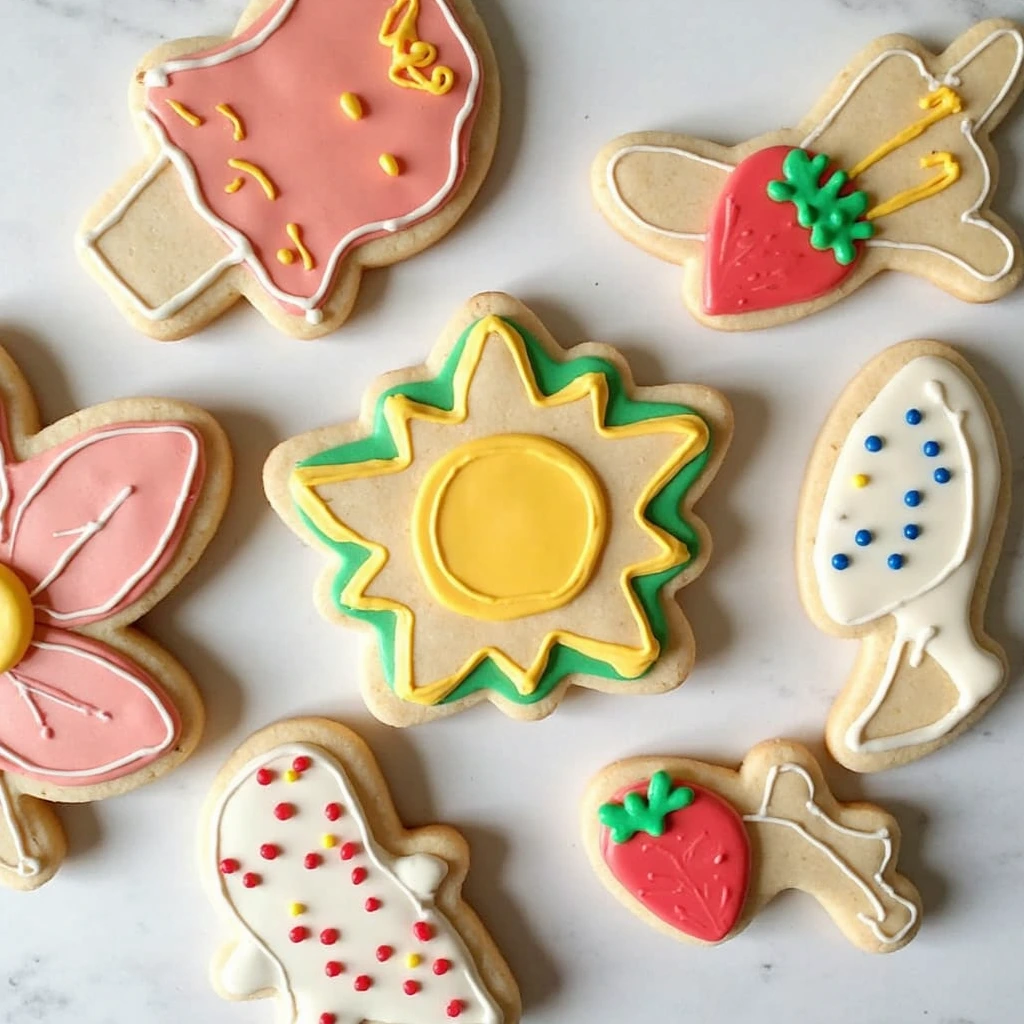
Step 10: Apply Your Designs
Using piping bags fitted with fine tips, apply designs with precision. Create base layers, add dimensional details, and incorporate edible glitter, sprinkles, or pearl dust for dazzling effects. Let each layer dry (2-3 minutes) before adding additional details to prevent color bleeding.
Nutritional Information
Per decorated cookie (based on approximately 36 cookies per batch):
| Nutrient | Amount |
|---|---|
| Calories | 185 |
| Total Fat | 8g |
| Saturated Fat | 5g |
| Cholesterol | 22mg |
| Sodium | 145mg |
| Total Carbohydrates | 26g |
| Dietary Fiber | 0.5g |
| Sugars | 18g |
| Protein | 2g |
Data Insight: These decorated cookies contain slightly higher sugar content due to royal icing, which comprises approximately 35% of the cookie’s final nutritional profile. One decorated cookie provides approximately 7% of daily recommended sugar intake.
Healthier Alternatives for the Recipe
Refined Sugar Reduction:
Substitute 25% of granulated sugar with coconut sugar, which has a lower glycemic index. This maintains sweetness while providing subtle caramel notes without significantly affecting icing consistency.
Whole Grain Integration:
Replace 30% of all-purpose flour with whole wheat pastry flour. This increases fiber content by 2g per cookie while maintaining the delicate texture essential for decorated cookies.
Alternative Sweeteners for Icing:
- Use honey or maple syrup mixed with powdered sugar for natural sweetness
- Try monk fruit sweetener for a zero-calorie icing option
- Incorporate cream cheese (reduces required sugar by 20%) while adding protein
Add Nutritional Boosters:
- Include ½ teaspoon ground cinnamon for antioxidants
- Add ⅛ teaspoon turmeric for anti-inflammatory benefits
- Mix in finely ground nuts (almond or pistachio) for healthy fats
These modifications reduce calorie content by 10-15% while maintaining the visual appeal essential to summer cookies decorated for special occasions.
Serving Suggestions
Party Display Ideas:
Arrange your summer cookies decorated on tiered cake stands to create visual drama. Group cookies by color or theme—blues and purples together evoke a cool aesthetic, while reds, oranges, and yellows create warmth.
Beverage Pairings:
- Cold lemonade or iced tea with citrus-decorated cookies
- Iced coffee with cookies featuring sophisticated geometric patterns
- Milk-based beverages with chocolate-themed decorations
Gifting Options:
Package decorated cookies in clear treat boxes with tissue paper for elegant presentation. Include a personalized label with baking date and storage instructions.
Seasonal Combinations:
Pair summer cookies decorated with ice cream sandwiches by placing scoops between two decorated cookies for a stunning frozen treat.
Common Mistakes to Avoid
Mistake 1: Oven Temperature Inconsistency
Problem: Uneven baking results in some cookies browning excessively while others remain underdone. Solution: Use an oven thermometer to verify actual temperature. Rotate baking sheets halfway through baking.
Mistake 2: Overmixing Dough
Problem: Develops excessive gluten, resulting in tough, cake-like cookies. Solution: Mix only until ingredients combine. A few flour streaks indicate proper mixing.
Mistake 3: Decorating Warm Cookies
Problem: Royal icing melts and slides off, creating muddled designs. Solution: Always cool cookies completely—minimum 15 minutes on wire racks.
Mistake 4: Incorrect Icing Consistency
Problem: Too thick icing clogs piping tips; too thin icing spreads uncontrollably. Solution: Adjust with powdered sugar (thicken) or water (thin) by small increments.
Mistake 5: Using Liquid Food Coloring
Problem: Thins icing, requiring excessive powder to compensate. Solution: Always use gel-based food coloring, which maintains icing consistency while providing vibrant colors.
Storing Tips for the Recipe
Short-Term Storage (3-5 Days):
Store cooled, decorated cookies in airtight containers at room temperature. Place parchment paper between layers to prevent icing damage and color transfer.
Medium-Term Storage (Up to 2 Weeks):
Refrigerate in airtight containers. Royal icing hardens further in cool temperatures, making cookies more durable.
Long-Term Storage (Up to 3 Months):
Freeze undecorated baked cookies in freezer-safe containers. Decorate only after thawing to room temperature, which requires 30 minutes.
Dough Preparation:
Freeze prepared (but unbaked) dough disks for up to three months. Thaw overnight in the refrigerator before rolling and cutting.
Humidity Considerations:
Avoid storing in humid environments, as moisture softens royal icing and compromises decorative designs. Use silica gel packets in storage containers during summer months.
Conclusion
Creating beautiful summer cookies decorated combines culinary technique with artistic expression, resulting in edible masterpieces perfect for any warm-weather celebration. By following this comprehensive guide—from preparing quality ingredients to mastering advanced decorating techniques—you’ll produce cookies that impress guests and family alike. Remember to chill your dough, cool cookies completely, and practice your icing application for consistently stunning results. We’d love to hear about your decorated cookie creations! Share your photos and experiences in the comments section below, leave a review with your feedback, or subscribe to our blog for exclusive decorating tutorials, seasonal recipes, and baking tips delivered straight to your inbox.
Best Amazon Picks :
- Zulay Kitchen Powerful Milk Frother.
- Sweejar Baking Pans Set.
- Hamilton Beach 6-Speed Electric Hand Mixer with Whisk.
FAQs
Q: Can I make these cookies ahead for a special event? A: Absolutely! Bake and cool cookies 2-3 days in advance. Decorate them 24 hours before serving for optimal icing firmness and visual presentation.
Q: What’s the difference between royal icing and other frostings for decorating? A: Royal icing hardens completely, creating professional-looking designs and allowing stacking. Buttercream remains soft and is better for immediate consumption.
Q: Can I use food coloring gels from the grocery store? A: Yes, gel food coloring works excellently. Avoid liquid food coloring as it thins icing and produces less vibrant colors compared to gel-based options.
Q: How do I prevent my royal icing from cracking? A: Add ½ teaspoon of meringue powder (in addition to what’s already in the recipe) to increase flexibility. Avoid baking cookies in direct sunlight, which causes rapid icing drying.
Q: Are there vegan alternatives for these decorated cookies? A: Yes! Use aquafaba (chickpea liquid) instead of egg whites for royal icing and substitute vegan butter. The results are nearly identical to traditional recipes.
Q: How long do decorated cookies stay fresh? A: At room temperature in airtight containers, they remain fresh and delicious for 5-7 days. Royal icing acts as a protective seal, maintaining texture and flavor.
Q: Can I make edible glitter at home? A: Yes! Mix edible luster dust with clear alcohol (vodka works well) to create custom edible glitter that perfectly matches your summer cookies decorated design scheme.