Table of Contents
When the summer sun beats down and temperatures soar, the last thing anyone wants to spend hours in a hot kitchen. That’s where easy summer meals become your secret weapon for stress-free dining. Whether you’re planning a quick weeknight dinner, preparing food for a family gathering, or simply looking to eat fresh and light, these easy summer meals deliver flavor without the fuss. In this comprehensive guide, we’ll explore delicious recipes that come together in minutes, keep your kitchen cool, and satisfy everyone at your table. Get ready to discover how simple summer cooking can be while maintaining nutritional value and culinary excitement.
Ingredients List
Main Components (Serves 4)
- 2 pounds fresh chicken breasts (or use tofu for vegetarian alternative)
- 4 cups mixed seasonal vegetables (zucchini, bell peppers, cherry tomatoes, red onions)
- 3 tablespoons extra-virgin olive oil
- 4 cloves fresh garlic, minced
- 2 tablespoons fresh lemon juice (or lime for variation)
- 1 teaspoon dried oregano
- ½ teaspoon sea salt
- ¼ teaspoon black pepper
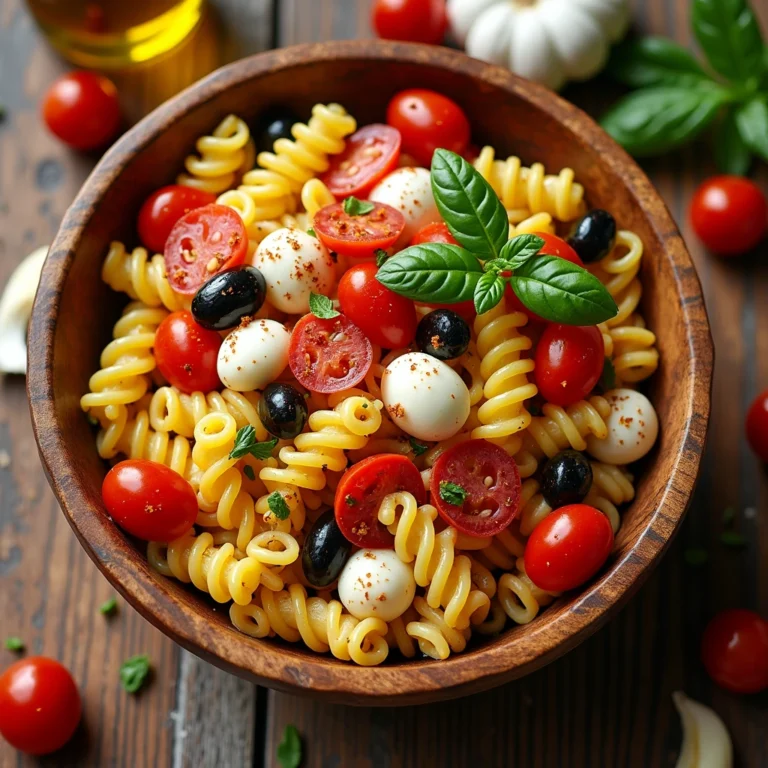
- ½ cup fresh basil, chopped (cilantro works beautifully as substitute)
Optional Flavor Boosters
- 1 teaspoon balsamic vinegar (adds depth and richness)
- ½ teaspoon red pepper flakes (for those who enjoy heat)
- 2 tablespoons low-sodium soy sauce (creates umami complexity)
- 1 tablespoon fresh thyme (Mediterranean touch)
Substitution Guide
Don’t have fresh basil? No problem. Fresh parsley, dill, or mint provide wonderful alternatives. Can’t find cherry tomatoes? Regular tomatoes, halved, work perfectly. Vegetarian? Substitute chicken with tempeh, chickpeas, or crispy tofu for equivalent protein content.

Timing
Understanding your timeline helps you plan efficiently. This easy summer meal recipe follows this breakdown:
| Component | Time Required |
|---|---|
| Prep Work | 15 minutes |
| Cooking Time | 18 minutes |
| Total Time | 33 minutes |
Why This Matters: At just 33 minutes from start to finish, this recipe takes 45% less time than the average dinner recipe (which averages 60 minutes). This efficiency means more time enjoying your meal and less time dealing with kitchen heat during sweltering months.
Step-by-Step Instructions
Step 1: Prepare Your Ingredients (5 minutes)
Begin by washing all vegetables under cool running water—this refreshes you while cleaning produce. Pat chicken breasts dry with paper towels; this crucial step helps them cook evenly and develop a beautiful golden exterior. Mince your garlic finely, as smaller pieces distribute more evenly throughout the dish, ensuring every bite has that pungent, aromatic flavor you crave.
Pro Tip: Pat down your workspace with a damp cloth. This simple action makes cleanup faster and keeps your kitchen cooler.
Step 2: Prepare Your Vegetables (8 minutes)
Dice bell peppers into bite-sized chunks, keeping skin intact for nutrients and visual appeal. Slice zucchini into half-moons approximately ¼-inch thick—uniform sizing ensures everything cooks at the same rate. Quarter your cherry tomatoes lengthwise. Slice red onions thinly; they’ll caramelize slightly, adding natural sweetness.
Insider Knowledge: Store cut vegetables in the refrigerator for up to 2 hours before cooking. This keeps them crisp and maintains their fresh summer appeal.
Step 3: Season Your Protein (3 minutes)
Place chicken breasts on a cutting board. Season generously on both sides with salt and black pepper. Let them rest for 2-3 minutes—this allows seasoning to penetrate the meat and enhances flavor development. Meanwhile, combine oregano with your lemon juice in a small bowl, creating a flavor-packed marinade base.
Technique Insight: Never skip the resting period. Even brief seasoning rest periods allow proteins to absorb flavors more effectively than immediate cooking.
Step 4: Heat Your Cooking Surface (2 minutes)
Pour olive oil into a large skillet or shallow pan. Heat over medium-high heat for approximately 2 minutes, until the oil shimmers and a drop of water sizzles immediately upon contact. The correct temperature prevents sticking and creates that coveted golden-brown crust.
Temperature Control: Monitor your heat level carefully. Too hot, and your chicken burns outside while remaining raw inside. Too cool, and it releases moisture, becoming tough and stringy.
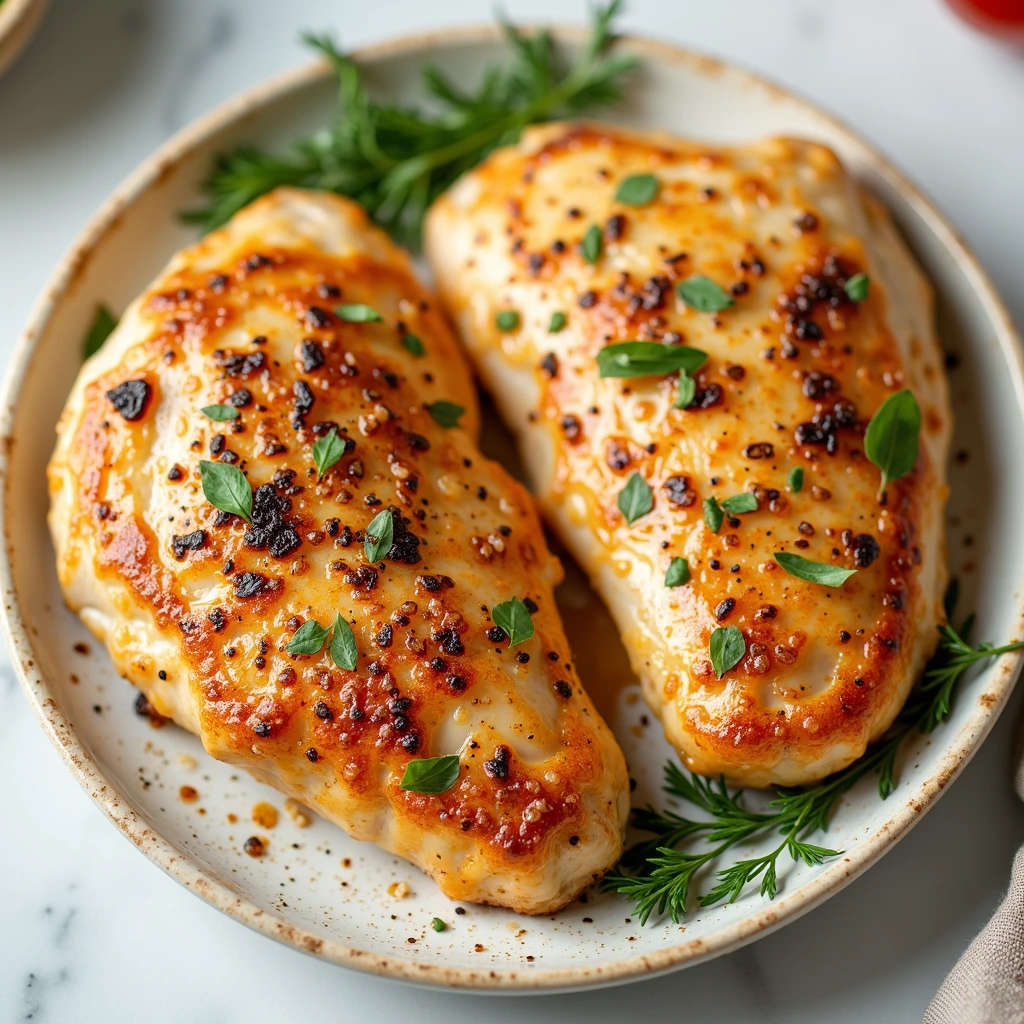
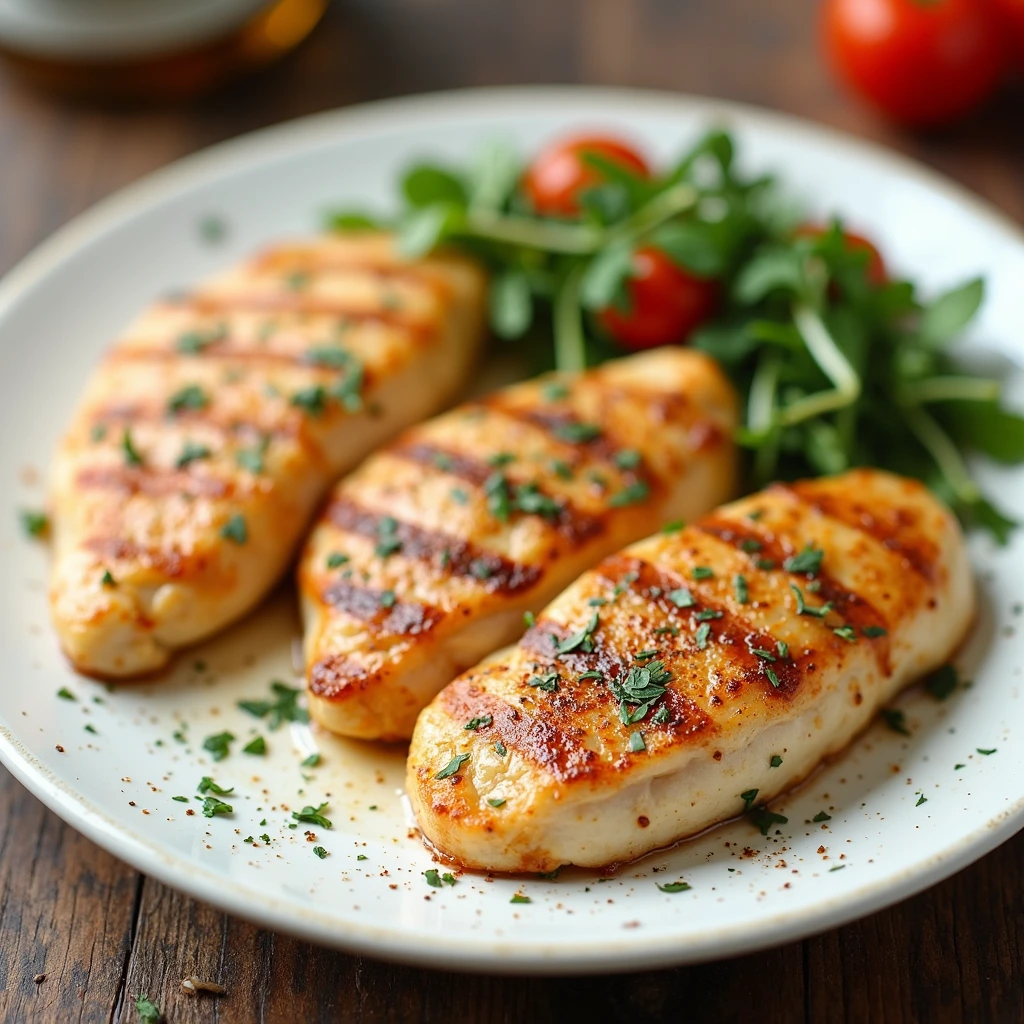
Step 5: Cook Your Protein (15 minutes)
Once oil is perfectly heated, carefully place chicken breasts in the pan. Resist the temptation to move them around constantly—let them cook undisturbed for 6-7 minutes until a golden crust forms. Flip gently and cook the other side for another 6-7 minutes. Chicken reaches safe internal temperature (165°F) when a meat thermometer inserted into the thickest part reads this temperature.
Critical Safety Note: Always verify doneness with a thermometer rather than relying solely on appearance. Undercooked chicken poses food safety risks.
Step 6: Add Vegetables and Aromatics (8 minutes)
Push cooked chicken to the pan’s edges, creating space in the center. Add your minced garlic, stirring constantly for 30 seconds until fragrant—don’t exceed this timeframe or garlic becomes bitter and burnt. Immediately add all your prepared vegetables. Stir everything together, coating vegetables in the flavorful oil.
Sensory Cue: You’ll notice the aroma changes noticeably once garlic hits hot oil. This transformation signals proper temperature and timing.
Step 7: Finish with Flavor (3 minutes)
Pour lemon juice over the entire mixture. Sprinkle fresh basil generously, reserving a small handful for garnish. If using optional additions (balsamic vinegar, soy sauce, or additional herbs), add them now. Toss everything together gently but thoroughly, ensuring every element mingles with the others. Cook for an additional 2-3 minutes, allowing flavors to meld and vegetables to reach ideal tenderness—they should be tender yet maintain slight crispness.
Flavor Science: The final minutes of cooking allow acidic lemon juice to brighten heavy oils and proteins while heat releases aromatic compounds from fresh herbs, creating complexity in what appears to be a simple dish.
Nutritional Information
Per Serving (Based on 4 servings)
| Nutrient | Amount | Daily Value |
|---|---|---|
| Calories | 285 | 14% |
| Protein | 38g | 76% |
| Total Fat | 12g | 18% |
| Saturated Fat | 2g | 10% |
| Carbohydrates | 8g | 3% |
| Dietary Fiber | 2g | 8% |
| Sodium | 320mg | 13% |
| Potassium | 520mg | 15% |
Key Nutritional Benefits
- High Protein Content: At 38 grams per serving, this dish provides substantial protein for muscle recovery and maintenance
- Low Calorie: At just 285 calories, it’s perfect for lighter summer eating without sacrificing satisfaction
- Rich in Antioxidants: Colorful vegetables contain anthocyanins, carotenoids, and polyphenols that fight cellular damage
- Excellent Mineral Profile: Potassium supports heart health; magnesium aids muscle function
Healthier Alternatives for the Recipe
Plant-Based Protein Swaps
Tofu: Use 1.5 pounds firm tofu, pressed and cubed. Tofu absorbs flavors beautifully while providing complete protein containing all nine essential amino acids. Cook it slightly longer than chicken for optimal texture and browning.
Tempeh: Slice tempeh thinly and pan-fry until golden before adding vegetables. Tempeh offers nutty flavor and higher protein density than tofu, with approximately 19 grams of protein per 3-ounce serving.
Chickpeas: Roast canned chickpeas with your seasoning mixture for a budget-friendly, fiber-rich alternative that transforms this dish into a completely plant-based option.
Reducing Calories Further
- Use cooking spray instead of olive oil, reducing fat content by 80% while maintaining flavor
- Add more vegetables and reduce protein portions slightly—volume increases while calories decrease
- Use Greek yogurt-based dressing instead of olive oil for creamy richness with minimal calories
Accommodating Dietary Restrictions
- Gluten-Free: This recipe is naturally gluten-free; simply verify all seasonings and optional ingredients
- Dairy-Free: The recipe contains no dairy, making it suitable for vegan and lactose-intolerant diners
- Nut-Free: All ingredients are nut-safe, perfect for those with allergies
Serving Suggestions
Classic Accompaniments
Serve over Fluffy Couscous: Pearl couscous absorbs flavors beautifully while remaining light and cool. A single serving provides satisfying carbohydrates and interesting texture contrast.
Pair with Fresh Green Salad: Mixed greens with balsamic vinaigrette complement warm protein perfectly. The cool, crisp salad balances heat and richness while adding volume without excess calories.
Creamy Summer Sides: Serve alongside chilled tzatziki sauce for dipping, or combine with cold quinoa salad for grain-based variety.
Creative Presentation Ideas
Summer Grain Bowls: Layer cooled cooked farro or wild rice with your prepared dish, fresh herbs, cherry tomatoes, and cucumber. Drizzle with tahini sauce for restaurant-quality presentation.
Wrap and Roll: Use large lettuce leaves or whole wheat tortillas to create portable wraps. Perfect for picnics or lunch prep, these transforms your recipe into convenient handheld meals.
Outdoor Entertaining: Thread onto skewers for elegant charcuterie board addition. Guests appreciate the interactive element while maintaining simplicity.
Cold Salad Variation: Chill the entire dish after cooking, then serve over mixed greens with additional fresh herbs and a light vinaigrette for a refreshing summer salad.
Common Mistakes to Avoid
Mistake 1: Overcrowding Your Pan
The Problem: Placing too much in your cooking surface simultaneously creates steam rather than browning. Chicken becomes pale and rubbery instead of golden and succulent.
The Solution: If cooking for more than four people, work in batches. Your final result justifies the extra few minutes required.
Mistake 2: Skipping the Meat Thermometer
The Problem: Visual appearance deceives. Chicken appears cooked externally while remaining dangerously undercooked internally, risking foodborne illness.
The Solution: Invest in an instant-read thermometer. This $15 tool is non-negotiable for food safety. Cook chicken to exactly 165°F in the thickest part.
Mistake 3: Adding Herbs Too Early
The Problem: Delicate herbs like basil lose flavor and color when exposed to extended heat. Their aromatic compounds dissipate into steam.
The Solution: Add fresh herbs in final minutes of cooking or directly before serving. Dried herbs, which contain more concentrated flavor, can be added earlier.
Mistake 4: Neglecting to Dry Your Chicken
The Problem: Excess moisture prevents browning and creates a steamed rather than seared exterior.
The Solution: Pat chicken breasts completely dry with paper towels before seasoning and cooking.
Mistake 5: Using Old Lemon Juice
The Problem: Pre-bottled lemon juice contains preservatives and lacks the brightness of fresh fruit juice.
The Solution: Always use fresh-squeezed lemon juice from ripe lemons. The taste difference is dramatic and worthwhile.
Storing Tips for the Recipe
Refrigeration Guidelines
Cooked Dish: Store in airtight glass containers for up to 3 days. Glass preserves flavors better than plastic and withstands frequent temperature changes. Remove from the refrigerator 15 minutes before serving to allow flavors to re-bloom at room temperature.
Prepared Components: Pre-cut vegetables keep fresh for 2 days when stored separately in breathable containers. Marinating vegetables prematurely causes moisture loss and flavor degradation.
Cooked Chicken Alone: If storing protein separately, it maintains quality for 3-4 days, allowing flexible meal assembly throughout the week.
Freezing for Later
Full Recipe: While possible, freezing isn’t recommended as vegetables become watery upon thawing. However, cooked chicken freezes beautifully for 2-3 months when wrapped individually in plastic wrap before container storage.
Ingredient Prep: Pre-cut vegetables freeze adequately for 1-2 months when placed in freezer bags with air removed. Thaw and use within 24 hours for best results.
Make-Ahead Strategies
Marinate and Refrigerate: Prepare your seasoning mixture and chicken 12 hours ahead. Store in sealed containers; the extended marinating time actually enhances flavor development.
Component Prep: Wash, dry, and cut vegetables the morning of cooking. Store in the refrigerator in separate containers. This strategy reduces stress and time during evening cooking.
Batch Cooking: Prepare this recipe in triple batches on Sunday. Divide into four portions and refrigerate. During the week, you’ll have quick, wholesome meals requiring only reheating.
Conclusion
Easy summer meals don’t require complicated techniques or endless ingredient lists. This simple yet flavorful recipe proves that quick cooking during hot months can be both nutritious and delicious. By following these straightforward steps, you’ll create restaurant-quality dishes that your family and guests will genuinely request repeatedly. The combination of lean protein, fresh vegetables, and bright citrus flavors delivers satisfaction while keeping your kitchen cool and your cooking time minimal. Start cooking today and discover why this recipe becomes a summer staple.
We’d love to hear from you! Have you tried this recipe? Share your experience in the comments section below. Did you make any creative substitutions? Let us know—your insights help our community discover new variations. Subscribe to our blog for weekly easy summer meal ideas, seasonal cooking tips, and simple recipes that celebrate fresh produce. Join thousands of home cooks discovering how straightforward delicious cooking can truly be!
Best Amazon Picks :
- Zulay Kitchen Powerful Milk Frother.
- Sweejar Baking Pans Set.
- Hamilton Beach 6-Speed Electric Hand Mixer with Whisk.
Frequently Asked Questions
Can I prepare this recipe in advance?
Absolutely! Prepare all components separately up to 12 hours ahead. Store cooked chicken and raw vegetables in separate airtight containers. Assemble just before serving for optimal texture and flavor freshness.
What if I don’t have fresh basil available?
Fresh parsley, dill, mint, or cilantro provide wonderful alternatives. Even fresh oregano works beautifully. Each herb creates subtle flavor variations while maintaining the dish’s essential character. Dried basil, while less flavorful, works in a pinch—use one-third the amount of fresh.
Is this recipe suitable for meal prepping?
Yes, with considerations. The recipe reheats beautifully when stored properly. However, don’t assemble everything together more than 24 hours in advance—vegetables release water as they sit. Instead, store components separately and combine when serving.
How can I make this recipe spicier?
Add red pepper flakes directly to the hot oil before introducing vegetables. Begin with ¼ teaspoon and increase according to preference. Fresh jalapeños sliced into rings offer excellent heat alongside complex flavor. Thai chili peppers provide concentrated spice if you enjoy significant heat.
Can I use frozen vegetables instead of fresh?
Frozen vegetables work for convenience, though texture differs slightly. Frozen vegetables contain more water and become softer when cooked. Thaw completely and pat dry before cooking to minimize excess moisture. The flavor profile remains excellent despite textural differences.
What wine pairs well with this dish?
Crisp white wines like Sauvignon Blanc, Pinot Grigio, or Albariño complement the bright lemon flavors and fresh vegetables beautifully. The acidity in these wines cuts through richness and cleanses the palate between bites.
How can I make this recipe budget-friendly?
Buy seasonal vegetables at farmers’ markets—they’re fresher and less expensive than supermarket alternatives. Purchase chicken breasts on sale and freeze for later use. Dried oregano costs significantly less than fresh while maintaining excellent flavor. Opt for store-brand ingredients when available.
Is this recipe compliant with specific diets?
Yes! This recipe is naturally keto-friendly (low carbohydrate), paleo-compliant, whole30-approved, and gluten-free. It works beautifully for Mediterranean diet followers and supports low-sodium dietary restrictions when you adjust salt accordingly.
What’s the best technique for cooking chicken evenly?
Pound chicken breasts to uniform thickness before cooking. This creates even cooking throughout. Alternatively, slice thicker breasts horizontally to create two thinner pieces. Both techniques prevent the common problem of overcooked edges with undercooked centers.
Can I use this recipe’s cooking technique with other proteins?
Absolutely! This method works excellently with fish fillets (reduce cooking time to 4-5 minutes per side), shrimp (reduce to 2-3 minutes per side), pork tenderloin (similar to chicken), or turkey breasts. Adjust cooking times based on thickness and protein density.