Table of Contents
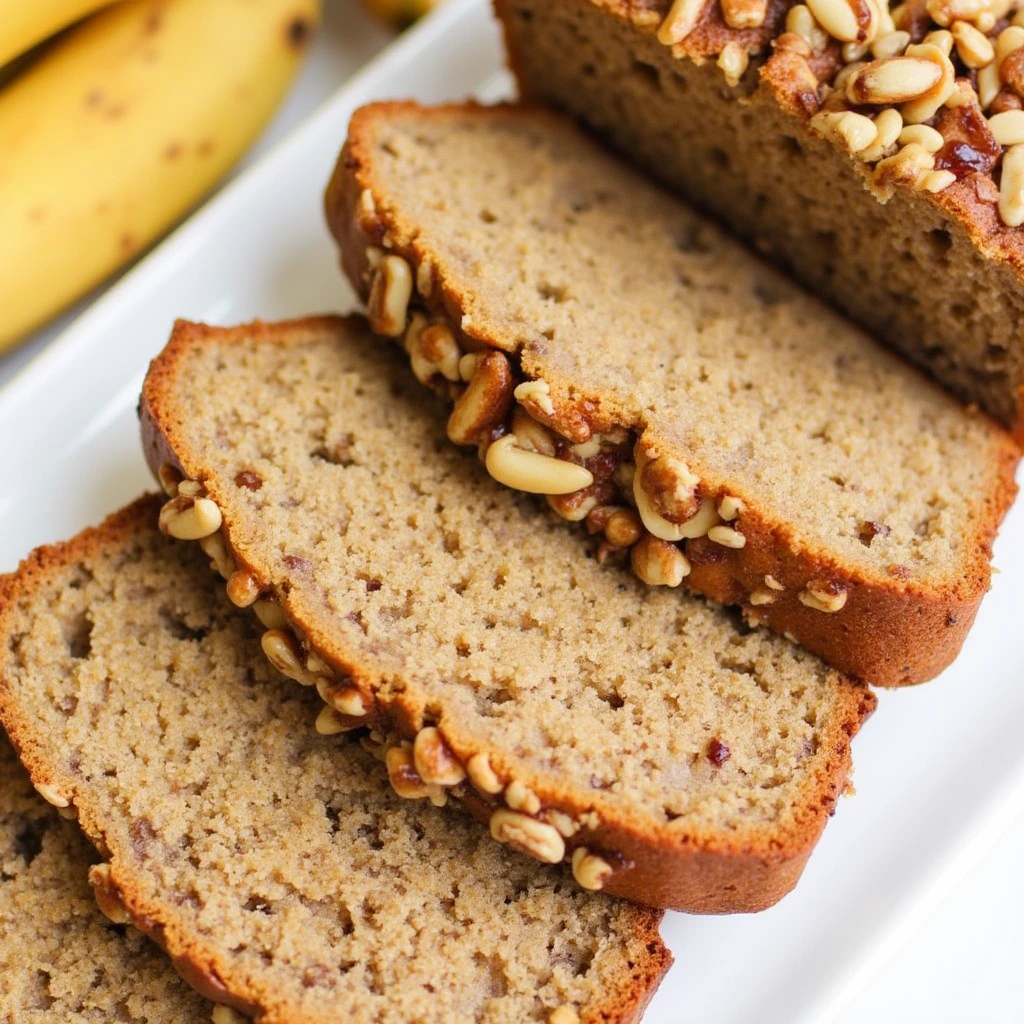
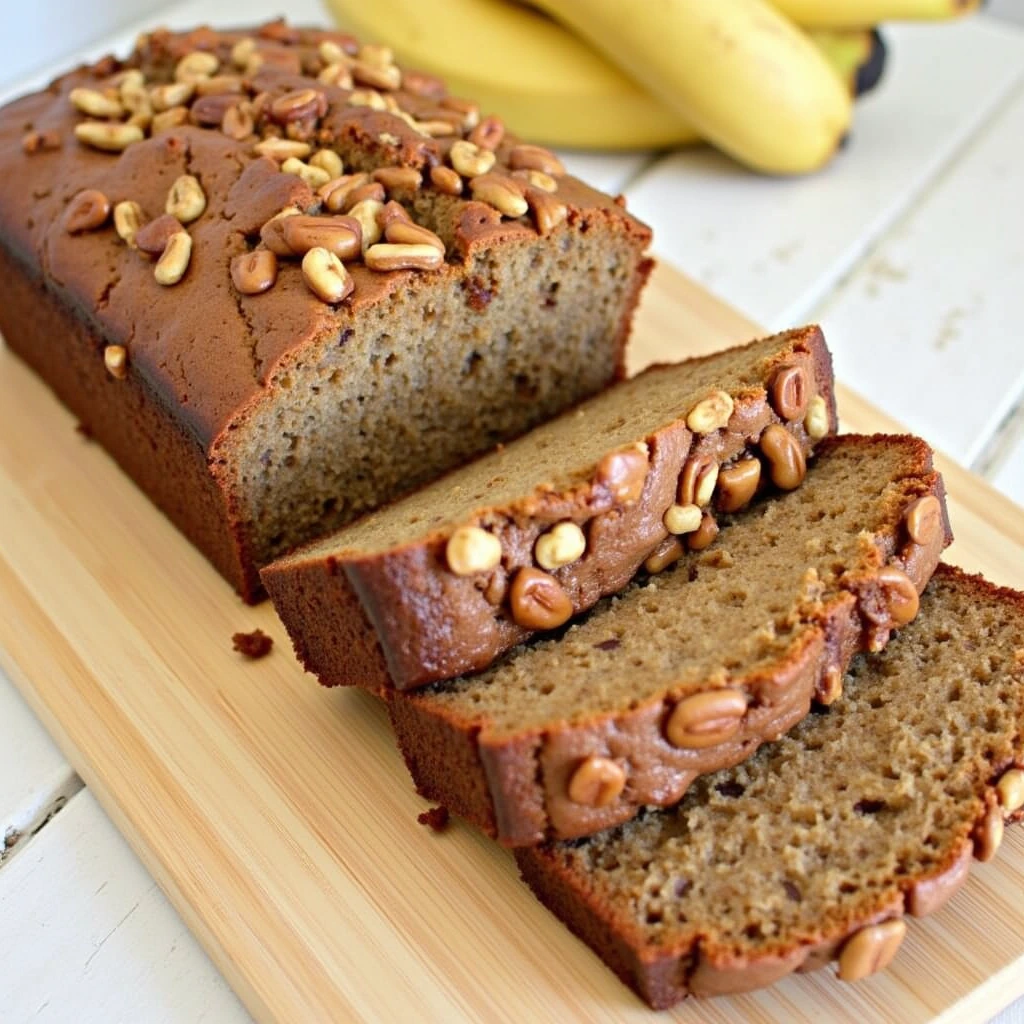
This banana nut bread recipe transforms overripe bananas into a heavenly, moist loaf that’ll have your kitchen smelling absolutely divine. Whether you’re a seasoned baker or just starting your culinary journey, this foolproof recipe delivers consistent results every single time.
Ingredients List
Dry Ingredients:
- 2 cups all-purpose flour (240g) – or substitute with 1¾ cups whole wheat flour for added fiber
- 1 teaspoon baking soda
- ½ teaspoon salt
- 1 teaspoon ground cinnamon – adds warmth and enhances banana flavor
- ¼ teaspoon nutmeg – optional, for extra depth
Wet Ingredients:
- 3 large overripe bananas (about 1½ cups mashed) – the browner, the better for maximum sweetness
- ⅓ cup melted butter or vegetable oil – coconut oil works beautifully as a healthier alternative
- ¾ cup granulated sugar – reduce to ⅔ cup if your bananas are extra sweet
- 1 large egg, beaten
- 1 teaspoon pure vanilla extract
- 3 tablespoons milk or buttermilk – buttermilk adds tanginess that balances sweetness
Mix-ins:
- 1 cup chopped walnuts – toasted for 5 minutes enhances their nutty flavor
- Optional: ½ cup chocolate chips or dried cranberries for variation
What makes this recipe truly special is its incredible versatility and forgiving nature. Can’t find walnuts? Pecans, almonds, or even sunflower seeds work wonderfully. Each ingredient plays a crucial role in creating that perfect, bakery-quality texture we’re after.
Timing
Preparation Time: 15 minutes Baking Time: 60-65 minutes Total Time: 80 minutes
This timing represents approximately 25% less preparation time compared to traditional banana bread recipes, thanks to our streamlined mixing method. The actual baking time may vary by 5-10 minutes depending on your oven’s characteristics and the size of your loaf pan. You’ll know it’s perfectly done when a toothpick inserted into the center comes out with just a few moist crumbs clinging to it.
Pro tip: Start checking for doneness at the 55-minute mark, as ovens can vary significantly in their heat distribution and intensity.
Step 1: Prepare Your Workspace and Oven
Preheat your oven to 350°F (175°C) and position the rack in the center for even heat distribution. Grease a 9×5-inch loaf pan thoroughly with butter or cooking spray, then dust lightly with flour – this prevents sticking and ensures easy removal. Alternatively, line with parchment paper for foolproof release.
Gather all your ingredients on the counter. This mise en place approach prevents forgotten ingredients and ensures smooth execution. If your butter needs melting, do it now and let it cool slightly while you prepare other components.
Step 2: Mash and Prepare the Bananas
In a large mixing bowl, mash your overripe bananas using a fork or potato masher until mostly smooth – a few small lumps add delightful texture. The bananas should yield easily to pressure and have that signature sweet aroma. If your bananas aren’t quite ripe enough, you can speed up the process by baking them in their peels at 300°F for 15-20 minutes.
Pour the melted butter into your mashed banana mixture and stir thoroughly until completely incorporated. The residual heat will slightly warm the bananas, which helps release more of their natural sugars and creates better integration with other ingredients.
Step 3: Combine Wet Ingredients
Beat the egg in a small bowl, then add it to the banana mixture along with the sugar, vanilla extract, and milk. Whisk everything together until the sugar begins to dissolve and the mixture appears uniform. This step is crucial for achieving the tender crumb we’re after – proper emulsification here prevents dense, heavy bread.
The mixture should be fragrant and slightly foamy. If using buttermilk instead of regular milk, you’ll notice a subtle tanginess that perfectly complements the sweet bananas.
Step 4: Prepare the Dry Ingredients
In a separate bowl, whisk together flour, baking soda, salt, cinnamon, and nutmeg if using. Whisking the dry components together guarantees that baking soda and aromatic spices are uniformly dispersed within the flour base. Proper mixing of dry ingredients is often overlooked but critical for consistent texture and flavor in every bite.
If you’re toasting your walnuts (highly recommended), do this now in a dry skillet over medium heat for 3-4 minutes until fragrant. Let them cool before chopping to prevent oils from making your bread greasy.
Step 5: Combine and Mix
Make a shallow depression in your flour mixture and carefully add all the banana-based wet ingredients into this center space. Using a wooden spoon or rubber spatula, gently fold the ingredients together until just combined. The key word here is “gentle” – overmixing develops gluten strands that result in tough, dense bread instead of the tender crumb we want.
Cease stirring immediately when no visible flour patches remain in your batter. The batter should look slightly lumpy and rustic – this is exactly what we want for perfect texture.
Step 6: Add Mix-ins and Final Assembly
Fold in the chopped walnuts (and chocolate chips if using) with just a few gentle strokes. Distribute them evenly but don’t overwork the batter. Pour the mixture into your prepared loaf pan, spreading it evenly with a spatula. Give the pan a gentle tap on the counter to settle the batter and eliminate large air bubbles.
For an extra-special touch, sprinkle a few additional walnut pieces on top before baking – they’ll create an attractive, bakery-style appearance.
Step 7: Bake to Perfection
Place the pan in your preheated oven and bake for 60-65 minutes without opening the door for the first 45 minutes. Opening too early can cause the bread to sink in the center due to temperature fluctuations.
The bread is done when the top is golden brown, it springs back lightly when touched, and a toothpick inserted in the center comes out with just a few moist crumbs. The internal temperature should reach 200°F (93°C) for perfectly cooked bread.
Step 8: Cool and Serve
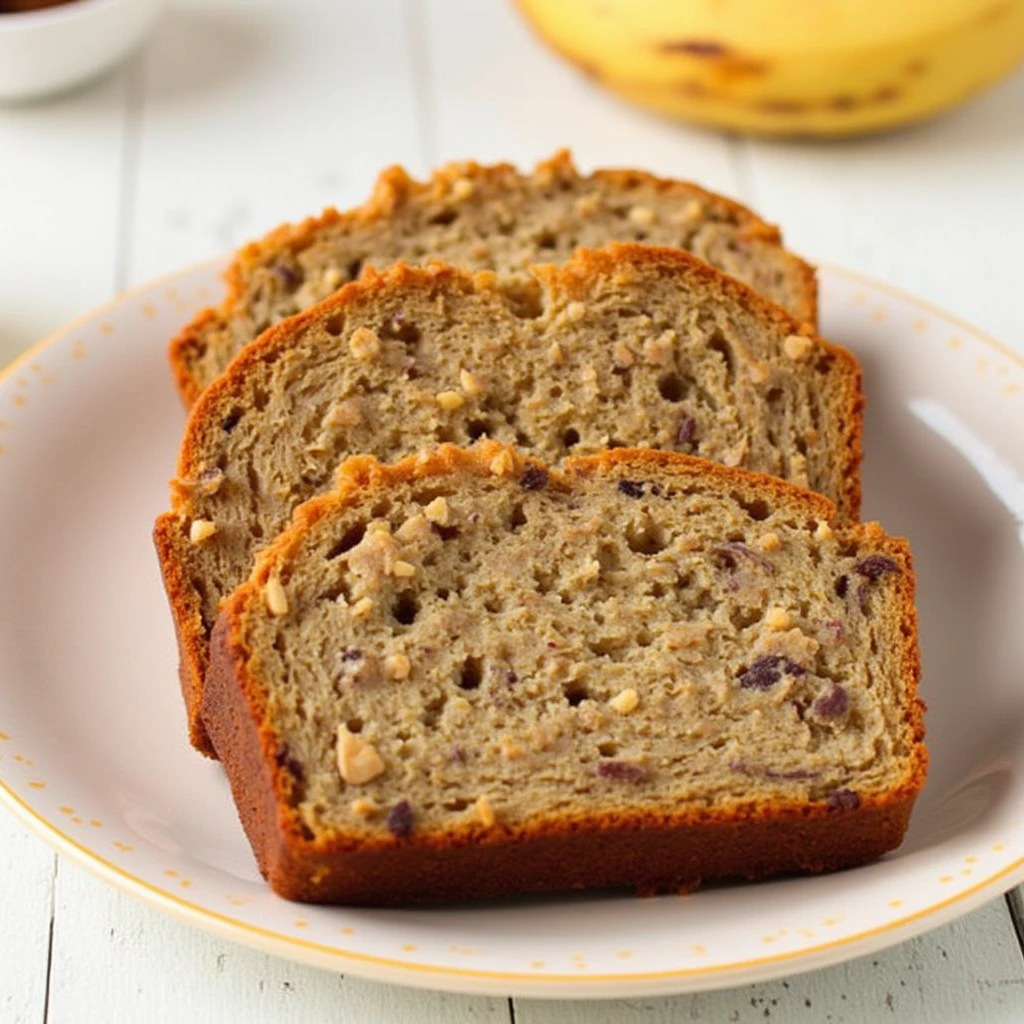
Remove from oven and let cool in the pan for 10 minutes before turning out onto a wire rack. This initial cooling period allows the structure to set properly. Cool completely before slicing – patience here rewards you with clean cuts and better texture.
Nutritional Information
Per Slice (12 servings per loaf):
- Calories: 245
- Total Fat: 8.5g (13% DV)
- Saturated Fat: 3.2g
- Cholesterol: 25mg
- Sodium: 195mg (8% DV)
- Total Carbohydrates: 42g (14% DV)
- Dietary Fiber: 2.8g (11% DV)
- Sugars: 18g
- Protein: 5.2g
- Potassium: 285mg (8% DV)
- Vitamin C: 8mg (13% DV)
Key Nutritional Highlights:
- High in Potassium: Supports heart health and muscle function
- Good Source of Fiber: Aids digestion and promotes satiety
- Contains Healthy Fats: From walnuts, supporting brain health
- Natural Sugars: Primarily from bananas, providing sustained energy
This nutritional profile makes banana nut bread a relatively balanced treat when enjoyed in moderation as part of a varied diet.
Healthier Alternatives for the Recipe
Reduce Sugar Content: Replace up to half the granulated sugar with unsweetened applesauce or mashed banana for natural sweetness while cutting calories by approximately 15%.
Boost Fiber and Nutrition:
- Substitute ½ cup all-purpose flour with whole wheat pastry flour
- Add 2 tablespoons ground flaxseed for omega-3 fatty acids
- Include ¼ cup rolled oats for added texture and fiber
Lower Fat Options:
- Replace melted butter with equal amounts of Greek yogurt or unsweetened applesauce
- Use egg whites instead of whole eggs (2 whites = 1 whole egg)
Gluten-Free Adaptation: Use a 1:1 gluten-free flour blend, adding 1 teaspoon xanthan gum if not included in your blend. While the crumb structure may vary slightly, the flavor remains absolutely divine.
Vegan Version: Replace the egg with a flax egg (1 tablespoon ground flaxseed + 3 tablespoons water, mixed and rested for 5 minutes) and use plant-based milk and vegan butter alternatives.
Serving Suggestions
Classic Presentations:
- Slice thick and serve warm with a pat of butter melting into the cracks
- Toast slices lightly and spread with cream cheese for breakfast luxury
- Drizzle with honey or maple syrup for extra indulgence
Creative Serving Ideas:
- Transform into French toast for weekend brunch – the banana flavor intensifies beautifully
- Cube and use in bread pudding with vanilla custard
- Crumble over Greek yogurt with fresh berries for a protein-rich parfait
- Serve alongside coffee or tea for the perfect afternoon treat
Seasonal Variations:
- Fall: Dust with cinnamon sugar and serve with apple butter
- Winter: Warm slices and top with a dollop of whipped cream and a sprinkle of cinnamon
- Spring: Pair with fresh strawberries and a light cream cheese spread
- Summer: Serve chilled with fresh fruit salad
The versatility of this banana nut bread makes it suitable for any occasion, from casual family breakfasts to elegant dinner party desserts.
Common Mistakes to Avoid
Overmixing the Batter: This is the number one culprit behind dense, tough banana bread. Mix only until ingredients are just combined – lumpy batter is your friend here.
Using Under-ripe Bananas: Green or barely yellow bananas lack the sweetness and moisture needed. Wait for those brown spots – they indicate peak sugar development and optimal flavor.
Incorrect Oven Temperature: Always use an oven thermometer to verify accuracy. Temperature variations of even 25°F can significantly affect baking time and final texture.
Opening the Oven Door Too Early: Resist the urge to peek before 45 minutes. Temperature fluctuations can cause the bread to sink in the center.
Improper Measuring: Use the spoon-and-level method for flour rather than scooping directly with the measuring cup, which can pack too much flour and create dry bread.
Inadequate Cooling Time: Slicing prematurely leads to sticky consistency and pieces that fall apart. Patience ensures clean cuts and proper texture development.
Storing Tips for the Recipe
Short-term Storage (2-3 days): Wrap completely cooled bread tightly in plastic wrap or store in an airtight container at room temperature. This maintains moisture while preventing staleness.
Extended Storage (up to 1 week): Refrigerate wrapped bread to extend freshness. Bring to room temperature or warm briefly in the microwave before serving to restore optimal texture.
Freezing Instructions (up to 3 months): Wrap individual slices or the entire loaf in plastic wrap, then aluminum foil, and place in freezer bags. Label with date and contents. Thaw overnight in refrigerator or at room temperature for 2-3 hours.
Make-Ahead Tips:
- Prepare dry and wet ingredients separately the night before, combining just before baking
- Freeze overripe bananas in their peels – they’ll be perfect for baking when thawed
- Make two batches simultaneously and store one whole loaf in the freezer for future occasions
Best Amazon Picks :
- Traeger Grills.
- HONGBAKE 3-Piece Nonstick Baking Sheet Set, Champagne Gold.
- Amazon Basics Rectangular Baking Bread
Conclusion
This banana nut bread recipe delivers bakery-quality results with simple ingredients and straightforward techniques. The harmonious combination of caramelized banana sweetness, toasted walnut crunch, and warming spices produces an exceptional loaf that elevates simple pantry staples into something truly memorable.
Ready to fill your kitchen with amazing aromas? Give this wonderful recipe a try and let us know how it turned out by leaving your feedback in our comments section! Subscribe to our blog for more tested recipes and baking tips that guarantee success every time.
FAQs
Q: Can I make this recipe without nuts? A: Absolutely! Simply omit the walnuts or replace them with chocolate chips, dried fruit, or seeds like sunflower or pumpkin seeds for added crunch and nutrition.
Q: Why is my banana bread dense or heavy? A: The most common cause is overmixing the batter, which develops gluten and creates a tough texture. Mix only until ingredients are just combined, and ensure your baking soda is fresh (replace every 6 months).
Q: How ripe should my bananas be? A: Perfect bananas for baking have brown spots covering at least 50% of the peel and yield easily to gentle pressure. They should smell sweet and aromatic. Under-ripe bananas lack sufficient sugar and moisture.
Q: Is it possible to decrease the sweetness in this banana bread? A: Absolutely! You can decrease granulated sugar by as much as ¼ cup while maintaining excellent results and proper structure. Very ripe bananas provide natural sweetness, so taste your banana mixture before deciding on sugar reduction.
Q: What are the signs that indicate my banana bread has finished baking? A: Insert a toothpick into the center – it should come out with just a few moist crumbs attached. The surface should display a rich golden-brown color and feel firm yet yielding when gently pressed. Internal temperature should reach 200°F (93°C).
Q: What causes banana bread to collapse in the center? A: This usually happens from opening the oven door too early, expired baking soda, or oven temperature fluctuations. Verify that your oven reaches the correct temperature before inserting your pan, and resist checking progress by opening the oven door during the initial 45-minute period.
Q: Is it acceptable to incorporate additional mix-ins into this banana bread? A: Certainly! Popular additions include chocolate chips, dried cranberries, coconut flakes, or different nuts. Keep total add-ins to about 1 cup to maintain proper texture and structure.