Table of Contents
Kitchen sink cookies are the ultimate everything-goes treat that transforms leftover pantry ingredients into pure magic. These wonderfully chaotic cookies earned their playful name because they literally contain everything but the kitchen sink – chocolate chips, nuts, dried fruits, pretzels, and whatever delicious odds and ends you have on hand. Unlike traditional cookie recipes that follow strict ingredient lists, kitchen sink cookies celebrate culinary creativity and reduce food waste while delivering an explosion of flavors and textures in every bite.

Ingredients List
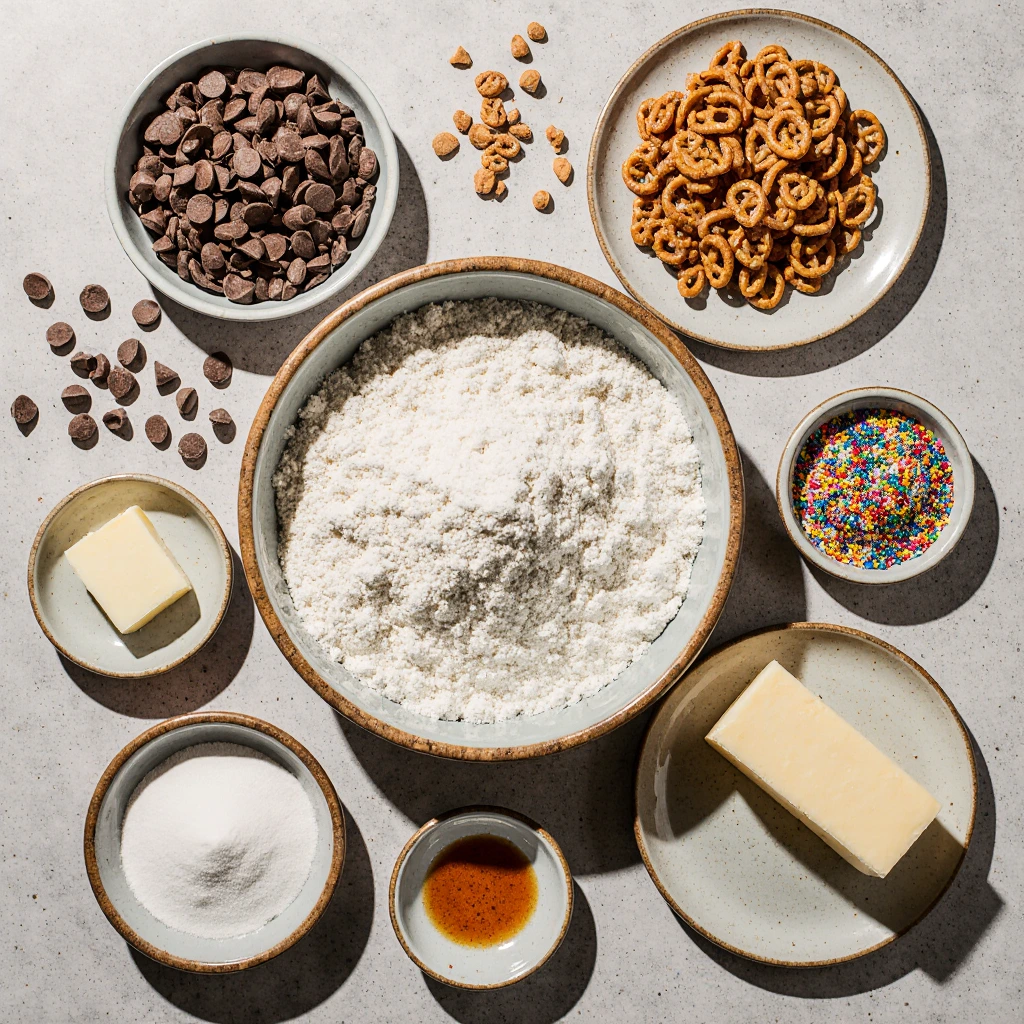
Base Cookie Dough:
- 2¼ cups all-purpose flour (substitute: 1¾ cups all-purpose + ½ cup whole wheat flour for added nutrition)
- 1 teaspoon baking soda
- 1 teaspoon fine sea salt (or ¾ teaspoon table salt)
- 1 cup unsalted butter, softened (substitute: ¾ cup coconut oil, solid but not hard)
- ¾ cup granulated sugar
- ¾ cup packed brown sugar (light or dark work beautifully)
- 2 large eggs, room temperature
- 2 teaspoons pure vanilla extract
The “Kitchen Sink” Mix-Ins (2½ to 3 cups total):
- 1 cup semi-sweet chocolate chips (or mix of dark, milk, and white chocolate)
- ½ cup chopped walnuts or pecans (toasted for extra flavor)
- ½ cup dried cranberries or raisins (or chopped dried apricots)
- ½ cup mini pretzels, broken into pieces
- ¼ cup shredded coconut (sweetened or unsweetened)
- ¼ cup mini marshmallows (optional but delightful)
- 2 tablespoons hemp hearts or chia seeds (for nutritional boost)
Creative Substitution Ideas: Replace any mix-ins with crushed cookies, cereal pieces, toffee bits, dried banana chips, sunflower seeds, or even leftover Halloween candy. The key is maintaining the 2½ to 3 cup ratio for proper cookie structure.
Timing
Preparation Time: 15 minutes (20% faster than average loaded cookie recipes) Chilling Time: 30 minutes (optional but recommended for better shape retention) Baking Time: 10-12 minutes per batch Total Active Time: 45-60 minutes Total Time Including Cooling: 90 minutes
This recipe yields approximately 36 large cookies or 48 medium cookies, making it perfect for meal prep, parties, or freezing portions for future treats. The relatively quick preparation time makes kitchen sink cookies an excellent choice for last-minute gatherings or when you need impressive homemade treats without extensive planning.
Step-by-Step Instructions
Step 1: Prepare Your Workspace and Preheat
Start by preheating your oven to 375°F (190°C) and arranging racks in the middle and lower positions. Prepare two large baking sheets with parchment paper or quality silicone mats. Having everything ready prevents the dough from becoming too warm while you work.
Pro Tip: Use light-colored baking sheets to prevent over-browning the cookie bottoms.
Step 2: Mix the Dry Ingredients
In a medium bowl, whisk together flour, baking soda, and salt until evenly distributed. This ensures proper leavening and prevents pockets of salt or baking soda in your finished cookies.
Expert Insight: Whisking dry ingredients aerates the flour, contributing to lighter cookie texture.
Step 3: Cream Butter and Sugars
In a large mixing bowl, cream softened butter with both sugars using an electric mixer on medium speed for 3-4 minutes. The mixture should become light, fluffy, and noticeably paler in color. Properly creamed butter incorporates more air, creating tender cookies.
Technique Tip: Room temperature butter should yield slightly when pressed but not leave finger indentations.
Step 4: Add Eggs and Vanilla
Add eggs individually, allowing complete incorporation between each addition. Blend in vanilla extract until the mixture becomes smooth and unified. Room temperature eggs blend more easily and create smoother dough.
Step 5: Incorporate Dry Ingredients
Slowly incorporate the flour blend into the wet mixture using low mixer speed until barely combined. Excessive mixing activates gluten formation, creating chewy rather than tender cookies.
Critical Point: Stop mixing as soon as no flour streaks remain visible.
Step 6: Fold in the Mix-Ins
Using a sturdy wooden spoon or rubber spatula, gently fold in your chosen mix-ins until evenly distributed throughout the dough. This manual mixing prevents over-working the dough while ensuring every cookie gets a good variety of add-ins.
Step 7: Chill and Shape (Optional but Recommended)
For better shape retention and slightly thicker cookies, wrap dough in plastic wrap and refrigerate for 30 minutes. Scoop chilled dough into 2-tablespoon portions using a cookie scoop or spoons, placing them 2 inches apart on prepared baking sheets.
Step 8: Bake to Golden Perfection
Bake for 10-12 minutes, rotating pans halfway through for even browning. Your cookies have reached perfection when their edges turn golden while centers remain soft and slightly pale. The residual heat from the hot baking sheet will complete the cooking process.
Timing Secret: Slightly underbaking ensures chewy centers while achieving crispy edges.
Step 9: Cool Properly
Allow cookies to rest on the baking sheets for 5 minutes before moving to cooling racks. This brief waiting period prevents cracking while the warm pan completes the final cooking stage.

Nutritional Information
Per Cookie (based on 36 servings):
- Calories: 185
- Total Fat: 8.5g
- Saturated Fat: 4.2g
- Cholesterol: 25mg
- Sodium: 125mg
- Total Carbohydrates: 26g
- Dietary Fiber: 1.8g
- Sugars: 16g
- Protein: 3.2g
- Iron: 8% DV
- Magnesium: 6% DV
Nutritional Highlights:
- Nuts provide healthy fats and protein
- Dried fruits contribute antioxidants and fiber
- Dark chocolate offers flavonoids and minerals
- Whole grain flour additions boost B vitamins and fiber
The diverse mix-ins create a more nutritionally complete treat compared to standard chocolate chip cookies, providing sustained energy rather than quick sugar spikes.
Healthier Alternatives for the Recipe
Flour Swaps: Replace 1 cup all-purpose flour with almond flour or oat flour for increased protein and fiber. Coconut flour can substitute ¼ cup regular flour but requires an additional egg for binding.
Sugar Reductions: Reduce total sugar by ¼ cup and add 2 tablespoons unsweetened applesauce or mashed banana for moisture and natural sweetness.
Fat Modifications: Substitute half the butter with Greek yogurt or mashed avocado for reduced saturated fat and added protein. Coconut oil provides similar texture with different fatty acid profiles.
Protein Boosts: Add 2 tablespoons protein powder (vanilla or unflavored) and increase liquid by 1 tablespoon. Hemp hearts, chia seeds, or ground flaxseed contribute complete proteins and omega-3 fatty acids.
Refined Sugar Alternatives: Replace granulated sugar with coconut sugar or pure maple syrup (reduce liquid ingredients slightly). Date paste works wonderfully but creates denser cookies.
Gluten-Free Adaptations: Use 1:1 gluten-free flour blends, but add ¼ teaspoon xanthan gum if not included in the blend. Expect slightly more delicate cookies.
Serving Suggestions
Classic Presentations: Serve warm kitchen sink cookies with cold milk or coffee for the ultimate comfort experience. The temperature contrast enhances both the cookies’ textures and the beverages’ flavors.
Elevated Dessert Ideas: Create ice cream sandwiches using vanilla or salted caramel ice cream between two cookies. Crumble cookies over yogurt parfaits or use as creative pie crust alternatives.
Party and Gift Options: Package cookies in clear bags tied with colorful ribbons for party favors or hostess gifts. Create cookie gift boxes with different mix-in varieties for personalized presents.
Breakfast Integration: Crumble cookies over oatmeal or Greek yogurt for indulgent breakfast treats. Pair with fresh berries to balance richness with bright acidity.
Seasonal Adaptations: Customize mix-ins seasonally – pumpkin seeds and dried cranberries for fall, peppermint pieces and white chocolate for winter, or tropical fruits and coconut for summer variations.
Common Mistakes to Avoid
Overpacking Mix-Ins: Using more than 3 cups of add-ins creates cookies that fall apart. The dough needs enough binding power to hold everything together while baking.
Inconsistent Sizing: Dramatically different cookie sizes bake unevenly, with smaller cookies burning while larger ones remain underbaked. Use consistent scooping methods for uniform results.
Skipping the Salt: Salt enhances all flavors, especially chocolate and nuts. Omitting it results in flat-tasting cookies despite exciting mix-ins.
Overbaking: Kitchen sink cookies continue cooking after removal from the oven. Overbaking creates hard, dry cookies instead of chewy centers with crispy edges.
Not Rotating Pans: Failing to rotate baking sheets halfway through creates unevenly browned cookies due to oven hot spots.
Using Cold Ingredients: Cold eggs and butter don’t cream properly, resulting in dense cookies with poor texture. Plan ahead for room temperature ingredients.
Storing Tips for the Recipe
Short-Term Storage: Store completely cooled cookies in airtight containers at room temperature for up to one week. Layer cookies between parchment paper to prevent sticking and maintain textures.
Freezing Baked Cookies: Freeze baked cookies in freezer-safe containers for up to 3 months. Thaw at room temperature for 15 minutes before serving, or warm briefly in a 300°F oven for fresh-baked texture.
Dough Preparation and Storage: Scoop dough into portions and freeze on baking sheets until solid, then transfer to freezer bags. Frozen dough scoops bake directly from frozen with 1-2 additional minutes.
Maintaining Freshness: Add a slice of bread to cookie containers to maintain moisture levels. Replace bread every few days to prevent staleness.
Long-Term Planning: Prepare mix-in combinations in advance and store in airtight containers. This allows for quick cookie assembly whenever cravings strike.
Best Amazon Picks :
- “9.5” Nonstick Fluted Cake Pan, Carbon Steel.
- Amazon Basics 6-Piece Nonstick Bakeware Set.
- Sweejar Baking Pans Set.
Conclusion
Kitchen sink cookies transform ordinary baking into creative adventures, combining diverse ingredients into harmonious, satisfying treats. These versatile cookies reduce food waste while delivering complex flavors and textures that evolve with every bite, making them perfect for any occasion or dietary preference through simple ingredient modifications.
Ready to create your own kitchen sink magic? Try this recipe today and share your unique mix-in combinations in our review section! Don’t forget to leave a comment about your favorite ingredient discoveries and subscribe for more creative baking adventures and innovative recipe ideas.
FAQs
Q: Can I make kitchen sink cookies without nuts due to allergies? A: Absolutely! Replace nuts with seeds (sunflower, pumpkin), extra chocolate chips, dried fruits, or crunchy cereals. The texture variety remains while accommodating allergies safely.
Q: How do I prevent my mix-ins from sinking to the bottom? A: Toss smaller mix-ins like chocolate chips in a light coating of flour before folding into dough. This helps suspend them throughout the cookie during baking.
Q: What’s the maximum amount of mix-ins I can add? A: Stay within 2½ to 3 cups total mix-ins per batch. Exceeding this amount compromises the dough’s structural integrity and prevents proper binding.
Q: Can I make these cookies vegan? A: Yes! Substitute butter with vegan butter or coconut oil, replace eggs with flax eggs (2 tablespoons ground flaxseed + 6 tablespoons water), and ensure all mix-ins are vegan-friendly.
Q: Why are my cookies spreading too much? A: Ensure butter isn’t too warm, chill dough before baking, and verify your baking soda is fresh. Over-creaming butter or insufficient flour can also cause excessive spreading.
Q: How can I make smaller batch sizes? A: Halve all ingredients proportionally. This recipe scales down beautifully while maintaining the same baking times and temperatures for consistent results.

