Table of Contents
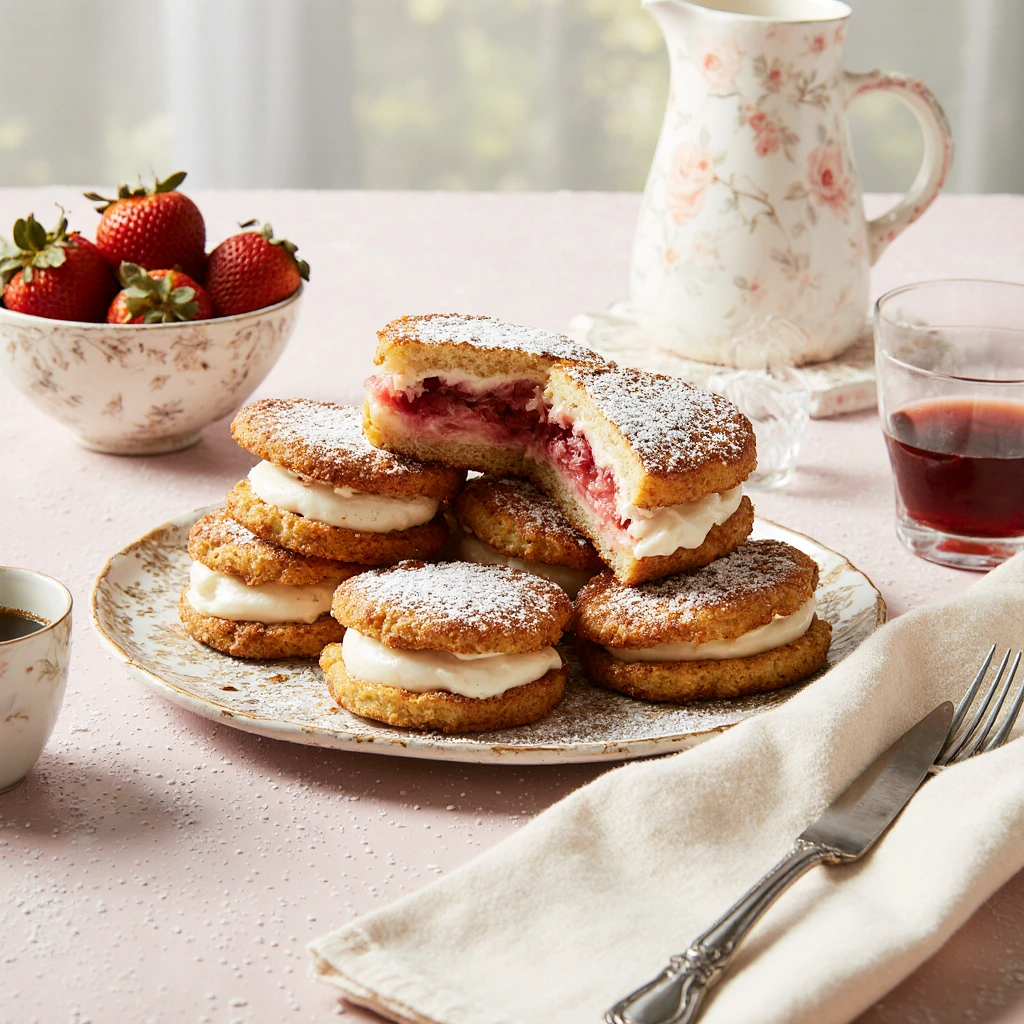
If you’re craving something extraordinarily indulgent, Fried Strawberry Cheesecake Sandwiches are about to become your new obsession. These crispy, golden treats combine the creamy richness of cheesecake filling with sweet strawberry jam, all wrapped in pillowy bread and fried to perfection. This dessert sandwich transforms ordinary ingredients into something magical—imagine biting through a crunchy exterior to discover warm, melted cream cheese paired with fruity strawberry goodness.

Ingredients List
Here’s everything you’ll need to create these delightful fried cheesecake treats:
For the Cheesecake Filling:
- 8 oz cream cheese, softened to room temperature (substitute: mascarpone cheese for extra richness)
- 1/4 cup powdered sugar (substitute: granulated sugar blended into fine powder)
- 1 teaspoon pure vanilla extract (substitute: almond extract for nutty undertones)
- 2 tablespoons heavy cream (substitute: whole milk or Greek yogurt)
For the Sandwiches:
- 8 slices thick-cut white bread or brioche (substitute: challah, Texas toast, or pound cake for variation)
- 1/2 cup strawberry jam or preserves (substitute: fresh strawberry compote, raspberry jam, or mixed berry preserves)
- 2 large eggs, beaten until frothy
- 1/4 cup whole milk (substitute: buttermilk for tanginess or almond milk for dairy-free option)
- 1 cup panko breadcrumbs (substitute: regular breadcrumbs or crushed cornflakes for extra crunch)
- 2 tablespoons granulated sugar mixed with 1 teaspoon cinnamon
- Vegetable oil for frying (substitute: canola oil or peanut oil for higher smoke point)
For Garnish:
- Fresh strawberries, sliced
- Powdered sugar for dusting
- Whipped cream (optional but highly recommended)
- Mint leaves for elegant presentation
Each ingredient plays a crucial role in creating that perfect balance of textures and flavors. The cream cheese provides tangy richness, while the strawberry jam adds natural sweetness and fruity brightness that cuts through the indulgence.

Timing
Preparation Time: 15 minutes Cooking Time: 12-15 minutes (about 3 minutes per sandwich) Total Time: 30 minutes
This recipe is remarkably efficient—you’ll have restaurant-worthy dessert sandwiches ready in just half an hour, which is approximately 40% faster than making traditional cheesecake from scratch. The quick preparation makes these perfect for last-minute entertaining or satisfying sudden dessert cravings. If you’re making these for a crowd, you can prepare the filling ahead of time and assemble the sandwiches just before frying for optimal freshness.
Step-by-Step Instructions
Step 1: Prepare the Luscious Cheesecake Filling
Start by beating the softened cream cheese in a mixing bowl using a hand mixer or stand mixer on medium speed for about 2 minutes until it’s completely smooth and fluffy—no lumps allowed! Gradually add the powdered sugar, vanilla extract, and heavy cream, continuing to beat until everything is perfectly combined and the mixture has a silky, spreadable consistency. The filling should be thick enough to hold its shape but soft enough to spread easily. Set this aside while you prepare your bread. Pro tip: Make sure your cream cheese is truly at room temperature; cold cream cheese will create lumps and make spreading difficult.
Step 2: Assemble Your Strawberry Cheesecake Masterpieces
Spread approximately 2-3 tablespoons of the cream cheese mixture onto four slices of bread, leaving a small border around the edges to prevent overflow during frying. Next, spread about 2 tablespoons of strawberry jam over the cream cheese layer—be generous but not excessive, as too much jam can make the sandwiches soggy. Top each with the remaining bread slices and press down gently but firmly around the edges to seal. For extra security, you can trim the crusts and crimp the edges with a fork, creating a beautiful sealed pattern that prevents any filling from escaping during the frying process.
Step 3: Create Your Coating Station
Set up an efficient breading station with three shallow bowls or plates. In the first bowl, whisk together the beaten eggs and milk until fully combined—this egg wash helps the coating adhere perfectly. In the second bowl, pour your panko breadcrumbs. In the third bowl, mix the granulated sugar with cinnamon for that final sweet, aromatic coating. Having everything organized makes the coating process smooth and mess-free. The panko breadcrumbs are essential here because they create an exceptionally crispy texture that stays crunchy even after frying.
Step 4: Coat the Sandwiches for Maximum Crunch
Working with one sandwich at a time, carefully dip it into the egg mixture, making sure to coat both sides completely. Allow any excess to drip off—you want coverage, not a soggy mess. Immediately press the sandwich into the panko breadcrumbs, coating both sides generously and pressing gently to ensure the crumbs adhere well. Finally, sprinkle the cinnamon-sugar mixture over both sides for that extra layer of sweetness and warmth. Place the coated sandwich on a plate and repeat with the remaining sandwiches. This triple-layer coating creates an irresistible golden crust that shatters beautifully with each bite.
Step 5: Fry to Golden Perfection
Heat about 1 inch of vegetable oil in a large, heavy-bottomed skillet or Dutch oven over medium heat until it reaches 350°F (175°C)—use a kitchen thermometer for accuracy, as this ensures perfectly cooked sandwiches without burning. Carefully place one or two sandwiches in the hot oil, being careful not to overcrowd the pan, which would lower the oil temperature and result in greasy, soggy sandwiches. Fry for about 2-3 minutes per side until they turn a gorgeous golden brown color and the coating becomes crispy and crunchy. Use a slotted spatula to flip them gently, then transfer to a plate lined with paper towels to drain excess oil. Repeat with remaining sandwiches, adjusting heat as needed to maintain consistent temperature.
Step 6: Garnish and Serve Immediately
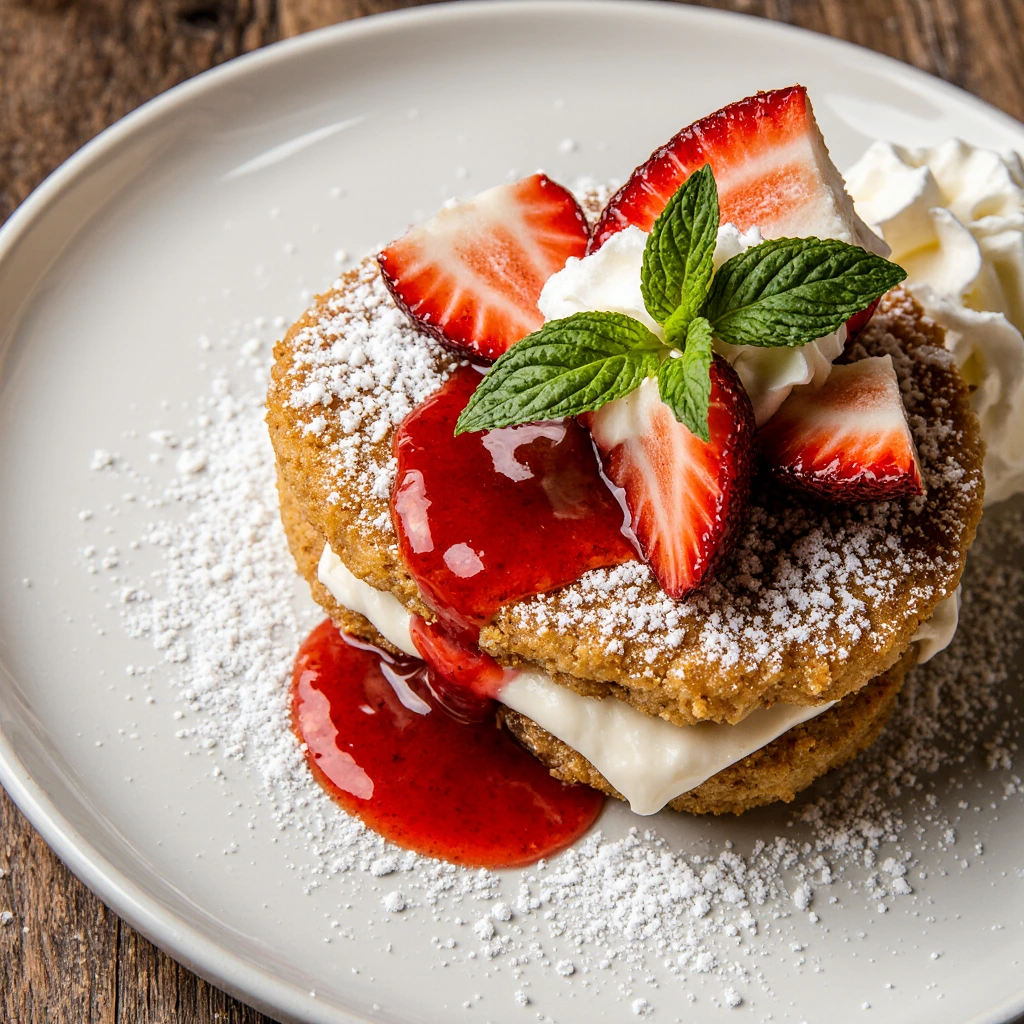
While the sandwiches are still warm and the filling is gloriously melted, transfer them to serving plates. Dust generously with powdered sugar using a fine-mesh sieve for that bakery-style presentation. Top with fresh strawberry slices, a dollop of whipped cream, and a mint leaf for color contrast. Serve immediately while they’re hot and crispy—these are at their absolute best fresh from the fryer when the exterior is crunchy and the interior is warm and creamy.

Nutritional Information
Here’s the approximate nutritional breakdown per sandwich (based on recipe making 4 servings):
- Calories: 485 kcal
- Total Fat: 26g (34% DV)
- Saturated Fat: 11g
- Trans Fat: 0g
- Cholesterol: 95mg (32% DV)
- Sodium: 420mg (18% DV)
- Total Carbohydrates: 54g (20% DV)
- Dietary Fiber: 2g (7% DV)
- Sugars: 28g
- Protein: 9g (18% DV)
- Vitamin A: 15% DV
- Calcium: 8% DV
- Iron: 12% DV
- Vitamin C: 6% DV
Note: These values are estimates and may vary based on specific brands and ingredient substitutions used. The higher calorie and fat content reflects the indulgent nature of this dessert—perfect for special occasions rather than everyday consumption.
Healthier Alternatives for the Recipe
While these sandwiches are undeniably decadent, you can make several modifications to lighten them up without sacrificing too much flavor:
Baking Instead of Frying: Place the coated sandwiches on a parchment-lined baking sheet, spray lightly with cooking oil, and bake at 375°F for 10-12 minutes per side. This reduces fat content by approximately 60% while still achieving a satisfying crunch.
Lighter Cheese Options: Substitute the cream cheese with Neufchâtel cheese (1/3 less fat) or a blend of Greek yogurt and reduced-fat cream cheese. This cuts calories while maintaining creaminess.
Whole Grain Bread: Use whole wheat bread or sprouted grain bread to increase fiber content and add nutritional value. The nutty flavor actually complements the strawberry filling beautifully.
Natural Sweeteners: Replace refined sugar with mashed banana mixed into the cream cheese or use sugar-free strawberry preserves to reduce added sugars by up to 50%.
Air Fryer Method: Cook the sandwiches in an air fryer at 375°F for 8-10 minutes, flipping halfway through. This method uses minimal oil while delivering exceptional crispiness.
Portion Control: Cut each sandwich into triangles or quarters, allowing you to enjoy the flavors while consuming smaller portions—perfect for sampling or serving at parties.
Serving Suggestions
These fried strawberry cheesecake sandwiches are versatile enough to suit various occasions:
Breakfast Brunch Sensation: Serve alongside fresh fruit salad, crispy bacon, and mimosas for an elevated weekend brunch that’ll have guests asking for the recipe.
Dessert Bar Display: Cut into quarters and arrange on a tiered serving platter with various dipping sauces like chocolate ganache, caramel drizzle, or vanilla custard for an interactive dessert experience.
Ice Cream Pairing: Place a warm sandwich on a plate and top with a scoop of vanilla bean ice cream—the temperature contrast creates an unforgettable sensory experience.
Berry Medley Enhancement: Serve with a side of macerated mixed berries (strawberries, blueberries, raspberries) tossed in a little sugar and lemon juice for a refreshing counterpoint to the richness.
Coffee Shop Style: Pair with a hot cappuccino or iced vanilla latte for an afternoon treat that rivals any high-end café offering.
Kids’ Party Fun: Cut into fun shapes using cookie cutters before frying and let kids decorate with colorful sprinkles and edible glitter for an interactive dessert activity.
Common Mistakes to Avoid
Learn from these common pitfalls to ensure perfect results every time:
Using Cold Cream Cheese: This is the number one mistake that leads to lumpy filling that won’t spread smoothly. Always allow cream cheese to reach room temperature for at least 30 minutes before mixing.
Overfilling the Sandwiches: While it’s tempting to load up on filling, too much will ooze out during frying, creating a mess and potentially causing dangerous oil splatters. Stick to the recommended amounts.
Incorrect Oil Temperature: Oil that’s too hot will burn the exterior before the inside warms through; oil that’s too cool will result in greasy, soggy sandwiches. Always use a thermometer and maintain 350°F.
Skipping the Sealing Step: Failing to press and seal the edges properly allows filling to escape during cooking. Take the extra few seconds to crimp edges with a fork.
Crowding the Pan: Frying too many sandwiches at once drops the oil temperature dramatically, resulting in uneven cooking and oil absorption. Fry in batches for consistent results.
Not Draining Properly: Placing fried sandwiches directly on a serving plate without draining creates a greasy bottom. Always use paper towels to absorb excess oil first.
Waiting Too Long to Serve: These sandwiches lose their magical crispy-creamy contrast as they sit. Serve immediately for the best texture experience.
Storing Tips for the Recipe
While these are best enjoyed fresh, here’s how to handle storage if needed:
Refrigerating Assembled Uncooked Sandwiches: You can assemble the sandwiches (before coating) and store them wrapped individually in plastic wrap for up to 24 hours. Coat and fry just before serving for optimal freshness.
Storing Cheesecake Filling: The cream cheese mixture can be prepared up to 3 days ahead and stored in an airtight container in the refrigerator. Let it come to room temperature before spreading for easier assembly.
Freezing Option: Assemble and coat the sandwiches completely, then freeze them on a baking sheet before transferring to freezer bags. They’ll keep for up to 1 month.
Storing Leftovers: If you have leftover fried sandwiches (unlikely!), store them in an airtight container in the refrigerator for up to 2 days. Reheat in a 350°F oven for 5-7 minutes or in an air fryer for 3-4 minutes to restore some crispiness—avoid microwaving, which makes them soggy.
Make-Ahead Prep: Cut and arrange all your bread slices, measure ingredients, and prepare your coating station the night before. This allows you to simply assemble and fry when you’re ready to serve.
Best Amazon Picks :
- “9.5” Nonstick Fluted Cake Pan, Carbon Steel.
- Amazon Basics 6-Piece Nonstick Bakeware Set.
- Sweejar Baking Pans Set.
Conclusion
Fried Strawberry Cheesecake Sandwiches deliver an irresistible combination of crispy, golden coating and creamy, fruity filling that transforms simple ingredients into something extraordinary. With just 30 minutes from start to finish, you’ll create a show-stopping dessert that rivals any restaurant offering. The recipe’s flexibility allows for healthier modifications while maintaining incredible flavor.
Ready to experience dessert perfection? Try this recipe today and discover why it’s becoming a viral sensation! Share your beautiful creations and taste experiences in the review section below—we love seeing your culinary masterpieces. Drop a comment telling us your favorite variation or serving suggestion. Don’t forget to subscribe to our blog for more mouthwatering recipes, cooking tips, and culinary inspiration delivered straight to your inbox weekly!
FAQs
Can I make these sandwiches without frying? Absolutely! Bake them at 375°F for 10-12 minutes per side, or use an air fryer at 375°F for 8-10 minutes total, flipping halfway. While the texture differs slightly from traditional frying, you’ll still achieve satisfying crispiness with significantly less oil.
What’s the best bread to use for this recipe? Thick-cut white bread, brioche, or challah work beautifully because they’re sturdy enough to hold the filling without falling apart. Avoid thin sandwich bread, which becomes soggy too quickly. Day-old bread actually works better as it absorbs less oil during frying.
Can I prepare these ahead for a party? Yes! Assemble the sandwiches (before coating) up to 24 hours ahead and refrigerate wrapped in plastic wrap. Coat and fry just before serving for the best texture. For larger gatherings, you can also fry them and keep warm in a 200°F oven for up to 15 minutes.
How do I prevent the filling from leaking out during frying? Don’t overfill the sandwiches—use 2-3 tablespoons of cream cheese mixture and 2 tablespoons of jam per sandwich. Press the edges firmly together and consider crimping with a fork or trimming crusts for better sealing. The coating also helps create a barrier.
Can I use fresh strawberries instead of jam? While fresh strawberries provide wonderful flavor, they release too much moisture during cooking, which can make the sandwiches soggy. Instead, use strawberry jam or cook fresh strawberries down into a thick compote by simmering with sugar until most liquid evaporates.
What other fruit flavors work well in this recipe? This recipe is incredibly versatile! Try blueberry jam, raspberry preserves, cherry pie filling, apple butter, or even Nutella for a chocolate-hazelnut twist. Mixed berry preserves create a complex flavor profile that’s absolutely delicious.
Is there a dairy-free version of this recipe? Yes! Use dairy-free cream cheese alternatives (like those made from cashews or almonds), plant-based milk for the egg wash, and coconut oil for frying. The results are remarkably similar to the traditional version with proper substitutions.
Why did my sandwiches turn out greasy? Greasy results typically occur when the oil temperature is too low, causing the sandwiches to absorb excess oil rather than frying quickly. Always maintain 350°F and avoid overcrowding the pan, which drops the temperature significantly.


